Wednesday, December 29, 2010

A Joyful Holiday Season

This holiday season, I had decided my goal was to make nothing but handmade crafts for Christmas. I am happy to say, I was able to achieve that goal. I would like to share with you some of the items I made and where I got the ideas from.

Can Walkers

Below you can see a picture of my daughter with the can walkers I made her. This was a very cheap and simple gift to make. I had bought two big cans of diced tomatoes at Costco awhile back ago and saved the cans. I took the labels off of the cans and I had my husband drill two holes into the side of each can. I painted each can with array of different color peace signs and then tied some rope onto them. My daughter tells me this was her favorite gift out of everything she got. The idea for these, came from Family Fun.

Monster Hoodie

This was a very fun project to make. I purchased the black hoodie from a local thrift store and used some of the fleece, that I had on hand, to add the eyes and the teeth to the hoodie. The idea for this came from a project posted on CO+K. I really liked the way this hoodie turned out and I'm really tempted to make one just for myself.


Polar Bear Hooded Scarf

My daughter has had a love for polar bears for the last couple of years. Last year we adopted a polar bear in her name. This year I wanted to do something a little different. I have been seeing hooded scarfs everywhere lately and I have been loving them.  I decided to make my daughter a polar bear hooded scarf out of fleece. Luckily for me Urban Treads sent me out an e-mail with a link on their tutorial on how to make a hooded scarf with a down loadable template. Once I had the hood scarf together, I took my sewing machine and did a zigzag stitch on the the edge of all the material, this was to give it an overlock stitch look or to make it look like I used a serger. Once, this part was done, I sewed on the paw prints onto the pockets and sewed on the eyes, nose and ears. In the ears I added a little bit of stuffing to help them stand up.


Wood Burning

I recently tried a new crafting technique, wood burning. It took me many tries to get the hang of it, but I have been enjoying it. I'm hoping I can get good enough at it, so that I can start doing some of the more detail work I have seen out there. I  ended up making some little ornaments for the tree. I ended up making a reindeer, a sun, a tree, and a pine tree as ornaments.


I hope everyone had a great holiday and I'm looking forward to a great new year!

Saturday, November 13, 2010

Harry Potter

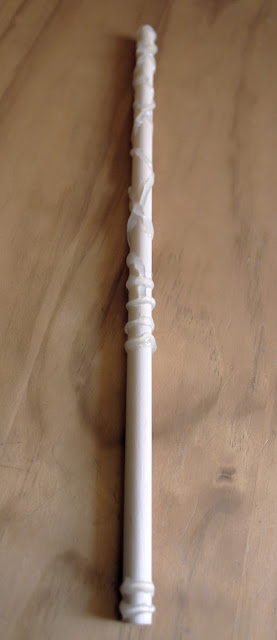
I love the Harry Potter books and the movies. I can't wait for the new movie to come out, next Friday. So, to get in more of the mood for the upcoming movie, my family and I re-watched all the movies that have been put out and now I got my daughter hooked on reading the books. I also join a Harry Potter Swap. I really enjoyed making all the items for my partner and even ended making double of some of the items. One of my favorite items I made was the Harry Potter style wand. I got the idea for the wand from this website. I changed my wand up a little bit, by using a dowel instead of paper, so that it would last longer. Below are pictures, with steps, of how I created mine and how you could make your own.


First Step

Get a dowel, that is the size you would like for your wand.

I got mine from the craft section at Walmart. If you are unable to find a dowel that would be wand size, you can get a long dowel from a hardware store and have it cut to size.


Second Step

Next, take a glue gun and go around the dowel to make a pattern.

I made some connecting crisscross patterns and circles around my wand.


 Third Step

Once the glue is dry and hardened apply a layer of acrylic brown paint to it. You may need to do 2 to 3 coats of this, to cover up the glue just right. After the paint is dry, used an acrylic sealer on it.


Once your wand is done, enjoy and have fun!

Here are some of the other fun items I made for the Harry Potter Swap

Hogwarts ornaments for the tree. I made an extra set for my daughter to give to her at Christmas.
These where made from round pieces of wood with holes drilled in them. I printed images I found on the web and then applied mod podge to them, to seal them in and give them a nice shine. I used different color ribbon for the hangers.


Special ingredients to be used wisely, in mini potion bottles. These labels I created in Illustrator and then just printed out and glued onto the bottles. The Beazor Stones are little pebbles, The Phoenix tears are glitter, and the Gillyweed is basil.

A pocket handbook of spells, where I wrote most of the Harry Potter spells down inside. I found the list of spells here. I took a small journal and covered it with a paper bag and used some scrapbook paper to make the name plate on the book.

Acceptance letter to Hogwarts. This was created in InDesign but could also be done in Microsoft Word. I printed everything onto special paper and even sealed the envelope with red wax, to give it an extra touch.

Group picture of all the goodies I sent.

In this swap I sent:
  • Berties Botts Beans
  • Droobles Blowing Gum
  • Pocket Handbook of Spells
  • Hogwarts Ornaments
  • A Wand
  • Potion Bottles
  • Acceptance Letter to Hogwarts
  • A Train Ticket to Hogwarts (this took me forever to make. I ended up designing this in Illustrator, with just looking at an image from the movie)
  • A Free the House Elves pin

Here is all the awesome items I got from my wonderful partner Rachie

She made me all items that would fit the house, I would be in, if I went to Hogwarts. I found out which house I was in by taking this quiz.

Monday, October 25, 2010

Zombie Costume

I just finished up my daughter's zombie dress. It was just in time too, because she needed to wear it in the haunted house she was in. For the dress, I went to a local thrift store and found a nice dress that could of been someone's homecoming or prom dress. From there, I re-sized it and added some straps from the material I had cut. Next, I had my daughter put it back on and ripped it up. Once that was done, I sewed in a piece of black material onto one of the sides of the dress we made a hole in. On the black material, I painted on some ribs with fabric paint. This was a really fun costume to make. I love being able to tear something up that was meant to be so pretty.


Here is what the dress looks like when I started.

Here it is re-sized and torn up

Here is the final project, unfortunately when this picture was taken she had already sweated off most of her make-up.


Sunday, October 3, 2010

Dairy Farm

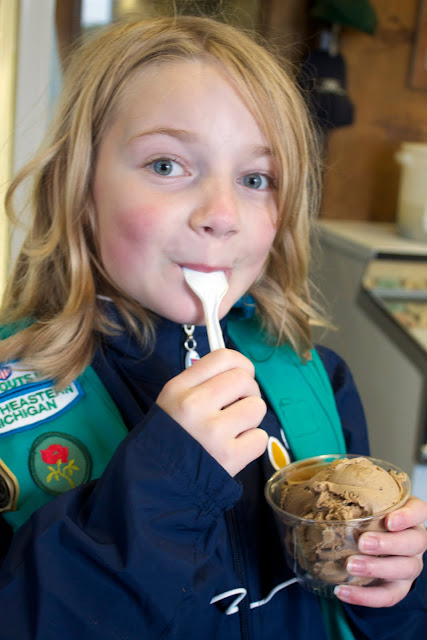
On Saturday we took a trip to a local dairy farm with my Girl Scout troop, where all the family members of the girls where invited to enjoy the day. It was a cold and rainy day, but it didn't stop us. We had fun visiting with the dairy cows and taking a hayride out way behind the farm to pick our pumpkins. After pumpkin picking we went and had some fame made ice cream.


.

Monday, September 27, 2010

Apple Picking

Every year we like to go apple picking. Yesterday seem like a perfect day for it. The weather was on the chilly side, but not so much that we would freeze. It was cold enough that the bugs weren't out, which I think is always a plus. We took a hayride out to the apple orchard and pick all kinds of different types of apples. The gala apples are my favorite and my daughter can't get enough of the golden delicious ones.

I can't wait to make some of our apples into apple sauce. There is nothing better then warm homemade applesauce and it makes the house smell soooo good. Homemade apple sauce is really easy to make. All you need is a crock pot, water, cinnamon, and peeled diced apples.

Directions to make Apple Sauce

 1) Peel and dice apples. (We like to peel many different types of apples for the sauce. I think peeling is the worst part of making the sauce.

 2) Fill up the crock pot with the diced apples and add water. Put enough water in to fill up about an inch of the crock pot's bottom. If it seems to be drying out while it is cooking, then you will need more water.

 3) Turn your crock pot on low and let it cook about 5 to 7 hours. (Sometimes I have even set it up to cook over night and have waken up to a wonderful smell.)

 4) Stir and add cinnamon. The amount of cinnamon depends on the taste you like. You can also add sugar if you would like, but we never do because we find it sweet enough already.

 5) Serve and enjoy. Leftovers should be kept in the fridge.


Now it is time for pictures :)


The beautiful apple I ate right off the tree. Yum yum.


Giant pumpkins! I see these every year and I always want to get one, but I never know what I would do with it. I just have a feeling would have lots of yummy pumpkin seeds in them. 

Sunday, September 26, 2010

A Homemade Birthday

This last Friday my daughter was invited to a slumber party. We found out that the Birthday girl really wanted a purse and that her favorite color was pink. Since we have been on a tight income and have been very into making crafts, we decided we would make a present that was completely handmade.

I decided that I was going to use the purse pattern, I had made and then make her some fingerless gloves with little bows on them. My daughter decided that she wanted to make the birthday girl a bracelet. The Birthday girl loved her presents and was very excited about the purse.


Tuesday, September 21, 2010

ATCs and more

In the last few days, I received some awesome ATCs in the mail. ATCs stands for Art Trading Cards. ATCs are mini works of art that are the size of trading cards or playing cards. I think they are a great way to express and share your art with others. This has been my 5th trade with ATCs and I'm addicted! I love getting items from all over the world. I love the special touches that people put into to them just for me. 


These came all the way from Canada. Unfortunately, the one with the heart mirror didn't make it through customs. That's okay I glued it back together and it is still cool looking. I love the stars and the monkey one.


These came from the East Coast. I love the monster ones on the top.


Here is my collection of ATCs so far in their sleeves. I finally got a binder to keep them in. 


Here are some ATCs that I have made and have sent to others.


More great news to share!
Before I went to bed last night, I got an e-mail that my zombie pendant, I listed on Etsy, was being feature in an article on BuyZombie.com. I couldn't believe it. I'm so happy about it. Here is a picture they used in their feature about the item. If you would like to see the full article you can go here.
If you would like to check out this guy in my Etsy shop click here.

Tuesday, September 14, 2010

The Painted Pot

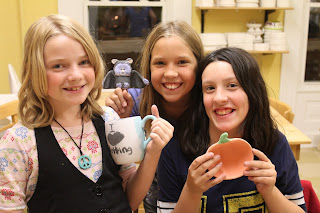
Tonight, I went to the Painted Pot with some friends and their daughters. The Painted Pot is a place where you can paint pottery and they will cook and glaze it for you. It was a lot of fun and we spent more time there then we plan to. I can't wait to go again.
Sugar skull I painted. I can't wait to see what its true colors look like once its cooked.


Looking down at the sugar skull


Girls with finish projects


Cool pumpkins that I wanted to paint, maybe next time.

Monday, September 13, 2010

Renaissance Festival

Yesterday, we went to an awesome Renaissance Festival they have here in Michigan.  I always love going. Since my friend had not gone since she was little, we tried to pack in as much as we could in one day. We visited almost all the shops and got to watch some of the shows. I love seeing the parade that walks through there. They try to send someone from every shop and some of the acts to be in it.

My friend and I both got our palm read while we were there. My palm reader told me I have a strong travel line and that I will find a way to make traveling work for me when I get older. I really do want to travel all over the world. I just want to experience everything I possibly can in this life.
 

This guy stop for me just to take his picture during the parade. He was so funny. Later we ran into him again and he kept trying to make my daughter's hat stand up straight.


Hob the Troll is a newer act the festival, but he is one of my favorites. He likes to sing songs and tell jokes as only a troll would. In between his acts he sits on a bridge where he has two baskets. One is labeled sing louder, the other is labeled hush money. When people put money into the basket he will do whatever the basket says to do.


I love this mask that we got my daughter. It is made out of the material used for quilting and is embroidered all over it. I been drooling over embroidering machine lately and this really makes me want one.
Beautiful head wreaths.

Lots of little bottles filled with all kinds a smelly good stuff. I just wanted to take them all. I love the look of all these bottles.

Glass blowing and fairy dust bottles, how cool.
My new ear cuff.  I love these and I'm going to try to make some of these on my own.
As we were leaving we ran into these fun characters. They were saying it was decorate Ann day. I love how they were doing it with yarn. Yarn bombing at its best!